Getting hacked and dealing with it

I’ve had two WordPress sites for years. They’ve also been dormant for years which means they don’t get updated as often as they should. This Resulted in both of them being hacked about the same time in the same way I think. I don’t know how they hacked the sites but both were full of posts about writing essays for money. I quickly rebuilt both websites within an hour because I didn’t care about the way it looks so both have new themes.

1. Install WordPress exporter and export all your real posts and pages. You might be able to do this by date or category.
2. Move the old website folder into it’s own and disable database access
3. Create a blank database and new database user
4. Install a brand new wordpress and import the posts and pages. Use a different password for your admin accounts.
5. Setup the menu and check the posts out.
6. Tweet the theme so suit you
7. Remove any themes and plugins you don’t use.

When you export the posts you may want to check them in a text editor before importing them into your fresh wordpress. I didn’t and discovered that Javascript had been put into all my posts. It was the same in each post so I removed this in one go by doing a find and replace in the database.

The lesson I’ve learnt it to make sure you keep your wordpress website up to date because these bloody things are fragile. I fixed a permission issue which means I can install updates from the admin instead of via SFTP. I also edited wp-login.php so it will only allow my IP address since I’m the only one that uses it.

The main reason I still have this website up and running is because most of the posts I have were written because at the time I couldn’t find the answer online. So I wrote the answer I came up with with the hope it will help someone else save hours figuring something out. I’m tempted to convert this over to a static website with Jeykll so I don’t have to worry about it.

Fedora 15 Emergency mode cause by JFS

Shortly after writing my previous blog I ended up right back where I started, with Fedora 15 dropping straight into emergancy mode. I did some poking and found out it had failed to mount my three JFS partitions. I tryed mounting them by hand and it said wrong FS type which was the error I was getting when I was working on installing Fedora 15 with JFS eariler.

When Fedora 15 drops into Emergency mode because it cannot mount JFS partitions, do the following for each partition and then hit Ctrl + D to boot normally.
fsck.jfs /dev/sda#

Installing Fedora 15 with JFS

I have Fedora 15 installed on my desktop with several JFS partitions including /home which I had created after installing Fedora 15. When I upgraded my graphics card Fedora 15 was stuck in emergancy mode so I went to reinstall it, this is where the problems with JFS begin.

When upgrading Fedora 15 it sees that my /home partition is JFS and it goes “sod this” and exits saying that you need to reboot, no chance to go back and make changes or anything, just reboot. Here are the steps required to install Fedora with JFS partitions, this should also works for other file systems that are not default for Fedora.

1. The first thing you need to do is download jfsutils-1.1.13-8.fc12.x86_64.rpm from here or your local Fedora mirror. Put this onto a USB stick; mine was FAT32 format.

2. As soon as the Anaconda installer starts, just after the “Do you want to check the disk?” question, hit “ctrl + alt + F2” to drop into a text terminal.

3. Mount your usb stick and install the JFS Utils rpm.

mkdir /mnt/usb
mount /dev/sdf7 /mnt/usb
rpm -ivh --nodeps /mnt/usb/jfsutils-1.1.13-8.fc12.x86_64.rpm
umount /mnt/usb

4. Decompress the JFS (or any other FS module you need) and load it into the kernel.

gzip -d /lib/modules/2.6.38.6-26.rc1.fc15.x86_64/kernel/fs/jfs/jfs.ko.gz
insmod /lib/modules/2.6.38.6-26.rc1.fc15.x86_64/kernel/fs/jfs/jfs.ko

5. If you are doing a fresh install you do not need to do this but if you are upgrading Fedora you will. You will need to run fsck on all your JFS partitions otherwise the installer will exit with an error saying it doesn’t know what FS it is.

Run fdisk to find out what partitions you need to run it on, in my case sda8, 9 and 10.

fdisk -l
fsck.jfs /dev/sda8
fsck.jfs /dev/sda9
fsck.jfs /dev/sda10

6. Press “alt + F6” and continue your installation

RHEL 6 and Nvidia

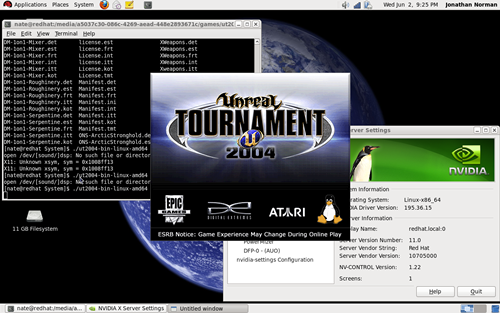
As you can see from a previous entry, I’ve been running Red Hat Enterprise Linux 6 (Beta 1) on my laptop for a while. It worked well out of the box once I configured my own boot loader for it. The laptop has a Nvidia 9300GS graphics card but I was unable to do heavy 3D work with the Nouveau driver so I installed the Nvidia binary driver.

This caused my laptop to die flashing at boot as it would load the Nouveau driver from the initramfs and then Xorg would try and load the Nvidia binary from the hard drive. To fix this I added the following line to my kernel option in grub 2.

rdblacklist=nouveau

This blocks the module from loading at boot which is what I really needed. It took me about half an hour to find this one line so I hope by writing this it won’t take you so long.

set root=(hd0,3)
menuentry "Red Hat Enterprise Linux 6 Beta" {
linux /vmlinuz-2.6.32-19.el6.x86_64 root=/dev/sda9 ro rdblacklist=nouveau
initrd /initramfs-2.6.32-19.el6.x86_64.img
}

RHEL with Nvidia

Qmake on PowerPC

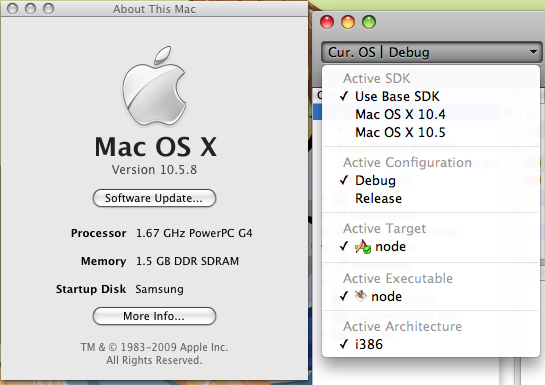
I’ve recently started learning Qt on mac and I’ve ran into a number of problems. One of the problems was caused by qmake creating a Makefile or Xcode project that specified / limited the target arch to i386. The first problem is that qmake creates a Xcode project on Mac by default, I’ve not used Xcode in quiet some time and was confused as to why “ppc” was not an option.

Missing PowerPC option in Xcode
Continue reading “Qmake on PowerPC”

Uninstall SSHKeychain

I recently upgraded from Mac OS X 10.4.11 to 10.5.8. Unlike Tiger, Leopard comes with it’s own ssh-agent which is tied into keychain which can remember the passwords for your ssh keys. I had SSHKeychain installed on Tiger so that I did not have to enter my key password when I connected using ssh but now that I am on Leopard I no longer need this.

The problem I faced after I had upgraded was that SSH_AUTH_SOCK was pointing to SSHKeychain instead of Leopard’s ssh agent. In order to remove the command line variables created by SSHKeychain you need to open .MacOSX/environment.plist with the text editor of your choice (I used vim) and remove the following lines.

[source]
<key>SSH_AGENT_PID</key>
<string>98</string>
<key>SSH_ASKPASS</key>
<string>/Applications/Utilities/sshAskPass.app/Contents/MacOS/sshAskPass
<key>SSH_AUTH_SOCK</key>
<string>/tmp/ssh-P8OlI2R0CM/agent.97</string>
[/source]

Once you have removed these lines reboot your mac. Once booted Keychain should now be managing your keychains. If not open Terminal and type ssh-add -k, this will add the default public keys to the agent.

I hope you found this information helpful. I had to look about for a while before I accidently stumbled across a website with this information.

vSphere Client on Windows 7

For the last few days I’ve been trying to install vSphere Client to manage a ESXi 4.0 server but it kept failing when it got to .Net J# on the installed. So I went online and downloaded the newest version I could, Update 1, which also failed. By this point I was getting rather annoyed as my work laptop is Windows 7, But as I was at home with a Windows XP desktop I’d thought I’d give it a go on that knowing that it will install.

It installed without a hitch on Windows XP. I navigated my way to the installation directory and copied it over the network to my latop. Annoying vSphere Client started straight away which leads me to believe that the installer is the fault and not the installed software.

To recap:
1. Install vSphere Client on non Windows 7 computer
2. Copy installation directory onto Windows 7 computer
3. Get on with the work you’ve been trying to do with VMware Go all this time.

Jon~

Red Hat Enterprise Linux 6 Beta + Grub 2

Yesterday I downloaded and installed RHEL 6 Beta but I didn’t install the boot loader. I already have Grub 2 installed and set up on my laptop with my other distros and Windows. RHEL 6 Beta uses Grub (Legacy) and this handles graphics different to Grub 2. I’ve been using LFS and CLFS for a while now for development so it’s been a while since I’ve used a full distro, with GUI and wireless an other very nice features (like the spell checker I’m using in FireFox).

Below is the Grub 2 configuration file I use to boot RHEL 6 Beta. I’m assuming you already have Grub 2 installed.

[source]
# Begin /boot/grub/grub.cfg

set gfxmode="1280x800x32" # Your resolution
set gfxpayload=keep
insmod gfxterm # Load modules
insmod vbe

set default=0
set timeout=5
set root=(hd0,3) # Your boot partition

menuentry "Red Hat Enterprise Linux 6 Beta" {
linux /vmlinuz-2.6.32-19.el6.x86_64 root=/dev/sda9 # Your root device
initrd /initramfs-2.6.32-19.el6.x86_64.img
}

# End /boot/grub/grub.cfg
[/source]

It took me about a day to work this out so I hope this helps you.

Jon~

C++ Aggregation Assocation

Hello all. I created the program at the bottom as a test as I was having problems with Aggregation Assocation in my assignment. The program below has the person class that we created in the last post but now it also has a new link class with two functions. The first function sets the pointer to the person, the second increases the person’s age by one. You can see that I have commented out the orginal command that sets the person’s age.

A pointer is a link to the RAM address of something else, in this case a instance of the person class. You access a pointer’s public functions / variables by the -> symbol. So pointer->setValue(newValue) would run the setValue function of what the pointer is connected too.

A Aggregation Assocation is a connection between two classes that do not own one another. For example a pet belongs to it’s owner but a student does not belong to a school as student and school are both independant entities that are connected.

This is something I did quickly and thought I’d stick online so if you have any questions leave a comment and I’ll get back to you.

[source language=”cpp”]#include <iostream>
#include <string>

using namespace std;

class person
{
private:
int age;
string name;

public:
// Constructors
person();
person(string newName, int newAge);

// Accessors
string getName() { return name; };
int getAge() { return age; };
// datatype getVariable() { return variable; };

// Mutators
void setName(string newName);
void setAge(int newAge);
// void setVariable(datatype newVariable);

};

person::person()
{
name = "Stranger";
age = 100;
}

person::person(string newName, int newAge)
{
name = newName;
age = newAge;
}

void person::setName(string newName)
{
name = newName;
}

void person::setAge(int newAge)
{
age = newAge;
}

///////////////////////////////////////////////////
class pointerClass
{
private:
person *link; // pointer to a person

public:
void setLink(person * newLink); // set the pointer to a person you’ve created
void incAge(); // increase their age by one

};

// set the pointer to a person you’ve created
void pointerClass::setLink(person * newLink)
{
link = newLink;
}

// Increse their age by one.
void pointerClass::incAge()
{
int temp = link->getAge(); //get Age
// cout << "temp: " << temp << endl; // output orginal age
link->setAge(++temp); // inc and set new age.
// cout << "temp: " << temp << endl; // output new age
}

///////////////////////////////////////////////////
int main()
{
pointerClass myLink;
person steve("Steve", 20);
myLink.setLink(&steve);
cout << steve.getAge() << endl;
// steve.setAge(21);
myLink.incAge();
cout << steve.getAge() << endl;
}[/source]